|
| |
3rd PARTY
LAYOUTS
LAYOUTS using TRAINZONE SCENERY
ITEMS |
|
This page is provided for
other modellers, who have used TRAINZONE Payware scenery items, to display screenshots of
their layouts which they have uploaded to the AURAN's TRAINZ download Station and which
are available to download from there.
These layouts all contain TRAINZONE payware
scenery items and, while these layouts are free downloads, you will require
all (or some) of the TRAINZONE payware content to experience the layout as the creators intended them to be.
|
| TRAINZONE has no
responsibility for the contents or modelling standard of these layouts. They are ENTIRELY
the work of the individual modelers. However they have been accepted by Auran for
inclusion on the Download Station and, as such, they have passed Aurans standards. |
|
|
|
|
Please
note that some of the downloads are linked to the Auran Download Station and
only available for free download by
registered users of TRAINZ |
|
Ongarue ....
Maine
Central.....
NZR (New
Zealand Rail) Johnsonville
Line.....
|
|
|
|
REQUIREMENTS:
1:
TRAINZ TS2010 or TS12
The Ongarue layout will run in TRAINZ TS2010 and
TS12 (but NOT TS2009)
(The route and sessions perform best in
TRS2010, but will also run it in TS12. (However
it should be noted that, due to changes made to
TS12, the sounds are better in TS2010)
|
2: TS:MURCHISON2 pre-installed
The ONGARUE layout makes extensive use
of the TRAINZONE NATURE SERIES 1 & 2
assets, textures and also a number of
other 3rd party assets that are included
with the officially released
TS:MURCHISON2 layout/program.
As such you will require TS:MURCHISON2
already installed into your TRAINZ
TS2010 or TS12 installation to avoid
missing payware Nature Series assets.
|
3: ADDITIONAL ASSETS (links below)
There are a number of additional 3rd party
assets required for the ONGARUE layout. The
additional assets are free downloads and can ALL
be downloaded and installed using the FULL
INSTALL link below.
Alternately, if you wish to avoid updating any
assets that you may have already installed and
updated, you can download and install the
MINIMUM INSTALL link. (This download only
includes the LAYOUT, SESSIONS and NEW ASSETS
used in the ONGARUE layout.
|
|
|
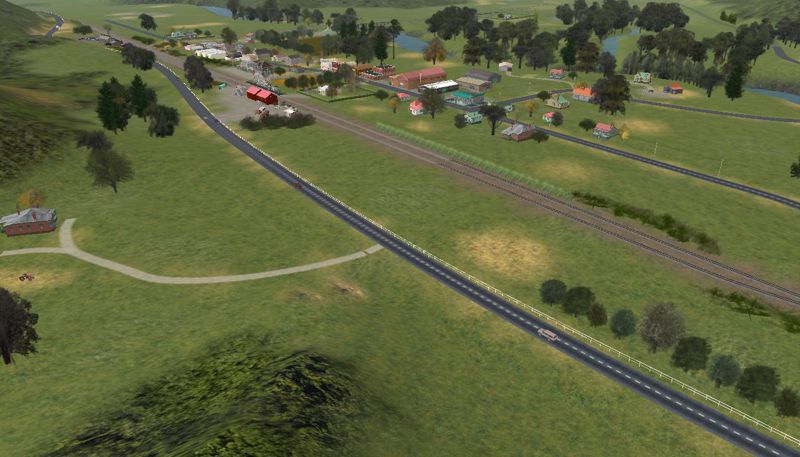
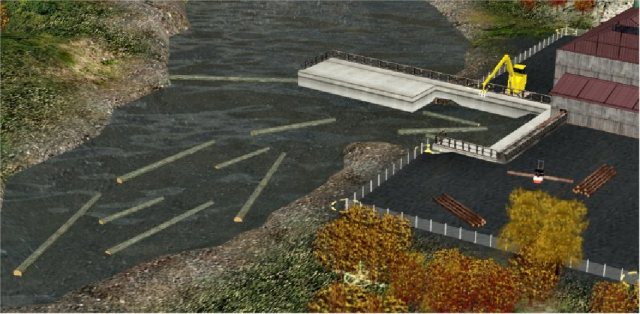
BRIEF HISTORY:
Ongarue is situated
approx. 25km’s North of Taumaranui and
what was once a busy township, is on the N.I.M.T. The town’s
demise began during the 1960’s, when the
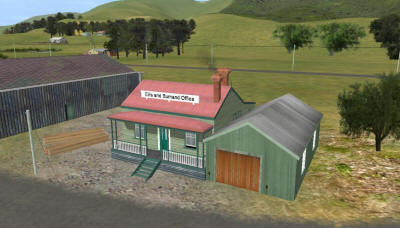
Ellis and Burnand timber milling operation closed down after a bad
storm had damaged a lot of it’s track
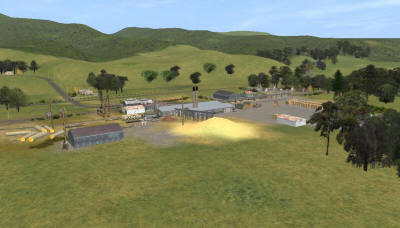
beyond economic repair. This route-build covers the timber mill, the
bush tram and camps which once existed. The main tram number 9 is
now under the care of DOC and is being converted to a walkway. Also
covered in this route-build is the main line section from Ongarue
down to Taumaranui. I present this build as “unfinished”
particularly in the bush section, so feel free to add to it if you
wish. I have left the terrain DEM and track vector lines in place to
make it easier.
The
mainline section includes the Okahukura station and yards (now all
but gone) and the Taumaranui station and yards as it was back in the
1960’s era.
|
|
|
|
|
|
nz_ongarue_full.zip
(74 Mb)
|
nz_ongarue_min.zip (26
Mb)
|
|
 |
|
Complete Maine Central route
running Northeast from Portland to Skowhegan and Northwest to Berlin, NH - all mainline
double track- About 30 interactive Sp2 passenger stations - many custom industries using
both TRS and LARS Systems - now contains about all of its trackage in the 1960s era, Now
including trackage contained within the central part of the state of Maine running up to
Rumford/Jay Area to International Paper Co, one of it largest customers. Route is well
over 200 baseboards in size and requires a decent sized computer to handle graphics. -
Many new inter-related industries - an example is Dover Lumber company is a shrink wrap
facility that wraps raw lumber from lumber mills that is then transported to a transfer
facility in Berlin, NH for the long trip to points west. Others include Coastal Chemicals
that provide sulfuric acid to paper industries; Complete Dairy handling facilities, etc.
basically a double track double dog-bone route with many sidings with custom industries.
For example - do the doughnut run (see the September issue of Virtual Railroader (feature
story found at http://www.virtualrailroader.com/index.html
) - carry wheat to grist mill, pick up flour, carry flour to bakery, pick up general goods
at bakery carry to distribution center to over the road semis - total miles about 70 and
time involved 1.5 hours actual. New Additions: Forest fire in Central Maine Area caused by
a hotbox; Many Maine unique industries such as B&M Beans, and Beach Cliff Sardines.
The route carries you through about 30 major towns and cities of Maine, with the
typical flavor of the area, the islands on the coast to the northern reaches of Maine and
New Hampshire. All passenger stations are SP2 interactive. All industries have interactive
trackage either TRS Standard or LARS depending on product needs.
The setting of the Map -
Time and date: 10:00 AM Nov 19, 1965 - Thursday. Today's Weather: expect rain, drizzle
and fog in upper elevations; with a chance of light snow in higher elevations of western
mountains. High temp today is 42 F, with cloudy to partly cloudy skies - typical late
November Maine Morning.
|
|
|
|
|
|
|
|
|
|
ABOUT THIS ROUTE
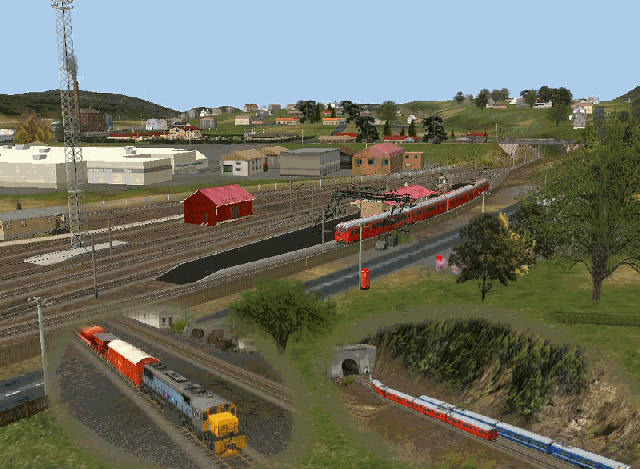
This route-build is a simulation of the
prototypical-electrified route from New Zealand’s capital city,
Wellington to Tawa. The old section from Wellington to Johnsonville
was once a part of the North Island Main Trunk, until 1938, when the
new Tawa deviation was opened. The old section of line between
Johnsonville and Tawa was removed shortly after the Tawa deviation
opening, but the Wellington to Johnsonville section was retained to
service the west suburbs. I have included both the old and present
day routes with this simulation.
REQUIREMENTS
This route build requires Trainz 2006 with SP1
installed. (If
you get a loading up error “cannot find map”, then you don’t have
SP1 installed.)
This route is only small (approx 100 boards) but is quite well
detailed, particularly in the Wellington station/yards area, so will
require a good mid-high spec. computer to run smoothly.
Requires payware item “Nature series 1” available
here ( as used
in both the MURCHISON LOGGING and the MURCHISON STAGE 2 layouts)
I have endeavoured to build this route using assets which I have on
my computer and only used the DLS when absolutely necessary. Those
assets are in: Trainz 2006 default, Murchison stage 2 and Trainz
Routes Volume 1 & 2.
From the DLS :
Trackside weeds/grass
 | kuid 136383:3325 |
 | kuid 136383:3326 |
 | kuid 136383:3335 |
 | kuid 136383:3336 |
shrubs/grass
 | kuid 328583:1310 |
 | kuid 136383:3201 |
 | kuid 136383:3250 |
 | kuid 136383:3365 |
Helicopter lift table by Vulcan
 | kuid 2:60238:60012:1 |
Invisible track green
 | kuid 60238:37038 |
Invisible track red
 | kuid 60238:37039 |
I recommend a visit to Vulcan’s site
http://www.ianztrainz.com.au/project6.htm
for more information and instructions on the use of his helicopters
and the lift table.
Aside from the above, you will require all my own creations,
available as freeware by clicking on the links
below
My creations:
 | Kuid 309161:100057
...... NZR Johnsonville route . |
 | kuid 309161:100011
...... NZR DM unit, blue. |
 | kuid 309161:100016
...... NZR DM unit, red. |
 | kuid 309161:100013
...... NZR D4 trailer, blue. |
 | kuid 309161:100015
...... NZR D3 trailer, red. |
 | kuid 309161:100005
...... NZR DM Pantograph. |
 | kuid 309161:100007
...... NZR DM Bogie. |
 | kuid 309161:100035
...... NZR Static Low poly D-DM refurbished. |
 | kuid 309161:100037
...... NZR Static Low poly D-DM old. |
 | Kuid 309161:100068
...... Extension Ladder 75deg. X 26ft. |
 | Kuid 309161:100020
...... Session, Bus Tour. |
 | Kuid 309161:100014
...... Session, Helicopter Explore. |
 | Kuid 309161:100019
...... Session, Somes Rail Ferry. |
 | Kuid 309161:100038
...... Session, Train Tour.
I have introduced a new region for this route called “NZ Classic
Cars” : kuid 309161:100030 |

You will need to download the new region plus these vehicles:
The classic vehicles :
 | kuid 309161:100026 = NZR road services
bus.(*) |
 | kuid 309161:100024 = NZR ways and works bus. |
 | kuid 309161:100031 = Ford Escort Van.(*) |
 | kuid 309161:100058 = Ford Escort Van 2(*) |
 | kuid 309161:100032 = Hillman Minx series 3.(*) |
 | kuid 309161:100034 = Bedford J Truck.(*) |
 | kuid 309161:100061 = Bedford J3 Truck. |
 | kuid 309161:100062 = Bedford J Towtruck.(*) |
 | kuid 309161:100033 = Morris Minor series 2 sedan.(*) |
 | kuid 309161:100059 = Morris Minor LCV series 2 van.(*) |
 | kuid 309161:100060 = Morris Minor LCV series 2 plumbers van.(*) |
 | kuid 309161:100063 = Morris Minor 1000 Traveller.(*) |
 | kuid 309161:100064 = Morris Minor 1000 Truck.(*) |
 | kuid 309161:100066 = Holden FC 1959.(*) |
 | kuid 309161:100067 = Holden FJ 1955.(*) |
 | kuid 309161:100065 = Bedford TK5 Bread Truck 1962. |
 | kuid 309161:100070 = Bedford TK4 Milk Tanker 1962. |
 | Kuid 309161:100069 = Austin A40 Farina.(*)
(*) = These vehicles are on the spawner. The rest are static only,
but are still required for this route. If you wish to use this
region for, say, an Australian route and don’t want the NZR bus,
then delete kuid 309161:100026 from this region. The region file can
take up to 15 vehicles.
|


English electric D-DM units in refurbished red and the blue and
silver livery as first introduced into Wellington in 1938. I built
these models originally for MSTS and converted them to run in Trainz
.They are basic at this stage and are non-passenger functional.
However, they do look the part in this route. On the plus,side they
are low in polys : a 6 x car set is less than 20k., so 2 or 3 AI
trains will not load down the route very much at all. ( some other
loco’s alone are more than 20k.) I have set the cabin sway to 10 as
these trains do tend to rock and roll a bit. While in cab view (
button 1 ) there are HOW and tracking views by pressing the { & }
keys. They are usually connected in multiples, i.e. DM with
pantograph and D trailer back to back with headlights facing away
from each other. This makes one set. To make a longer train, they
are connected as two or three sets, i.e. a 4 x car or 6 x car
multiple set.

These static models are very low poly and can be placed in yards,
etc. to offer a more realistic look.
SESSIONS
I have created 4 x simple sessions to demonstrate this route:
These sessions are simplified and I recommend you drive the vehicles
manually. Do not issue “drive to” commands.
|
Session:
Bus Tour


This session requires the single decker Daimler driveable
bus and its dependanciesby Andi06, kuid 2:122285:605:3
I recommend a visit to Andi06 site @
www.ajsmith.nildram.co.uk/trs/
for more information and instructions for this bus. Also, some other
great projects under way there.
I have placed track markers at the Wellington and Johnsonville bus
terminus. These are there to activate the bus destination blinds,
but will have to be set up.
To set up bus destination blinds:
 | Left click on “Surveyor” |
 | Left click on “Bus Tour” |
 | Left click on “load” and wait for session to load completely, could
take a couple of minutes. |
 | Left click on the “trains” icon, bottom button, or F7. |
 | Left click on the ? properties, then left click on the bus. |
 | A properties menu will then open - Right click on “route selection”. |
 | Enter the “from”, “to” , “direction” , “start of route” and
“terminus” as in the properties box pic above. |
 | Left click on the green tick. |
 | Hover the mouse icon arrow at the top left of the screen and the
surveyor menu will drop down. Left click on “save”, then exit
surveyor. |
Now, when you enter the Bus Tour session in “Driver”, the bus will
appear at the Wellington Station entrance and the destination blind
will be displaying “Wellington”. As you drive forward to pick up
your waiting passengers the blind will change to “Johnsonville”.
When you drive to Johnsonville and approach the terminus, the blind
will change back to “Wellington”.
To assist in driving the bus around the route, I have placed caution
boards with a “turn left” or “turn right” sign. These have been
placed wherever a sharp turn is coming up. Of course, the bus can
only go that way, but the signs will alert you to slow down for the
turn. See the pic Below.
I have used the same invisible track for the bus route and the ferry
route. If you want these routes to show up on the map, then add this
line to the “Track Invisible” kuid : -10:137 config txt. file :
<visible-on-minimap 1 >
|

|
|
Session:
Helicopter Tour

This session requires the Bell EP412 helicopter by Vulcan, kuid
2:60238:9499:1 and dependancies. I recommend a visit to Vulcan’s
site @ www.ianztrainz.com.au/project6.htm for more information and
instructions for this helicopter. Explore this route from the air.
|
|
|
Session:
Train Tour

This session requires my DM units ( which you should already have)
and the NZR DX loco Kuid 80375:100016 = NZ-Trainz Rail 1. You will
be driving a 4 x car 1938 blue multiple unit out of Wellington
station, heading for Tawa via the Ngaio gorge.
Keep alert for the signals as southbound traffic is approaching
you.Once at Tawa, hop trains into the waiting 6 x car multiple unit.
Your drive back to Wellington is via the long tunnel, which burrows
its way beneath Paparangi and Newlands.
Navigating the Wellington yard signals :
Quite frankly, setting up the signals in the Wellington yard proved
to be a logistical nightmare. They do work, but occaisionally you
may be confronted by a red light. I have used “permissive” signals
where possible - this means you can proceed without penalty up to
the next red signal. In most cases, however, you will get a red if
the points (junction) between you and the next signal in the block
are not set in your favour. If you move forward and set these points
in your direction ( or set them on the minimap) then you will most
likely be allowed a caution yellow or a green. |
|
|
Session:
Somes Rail Ferry
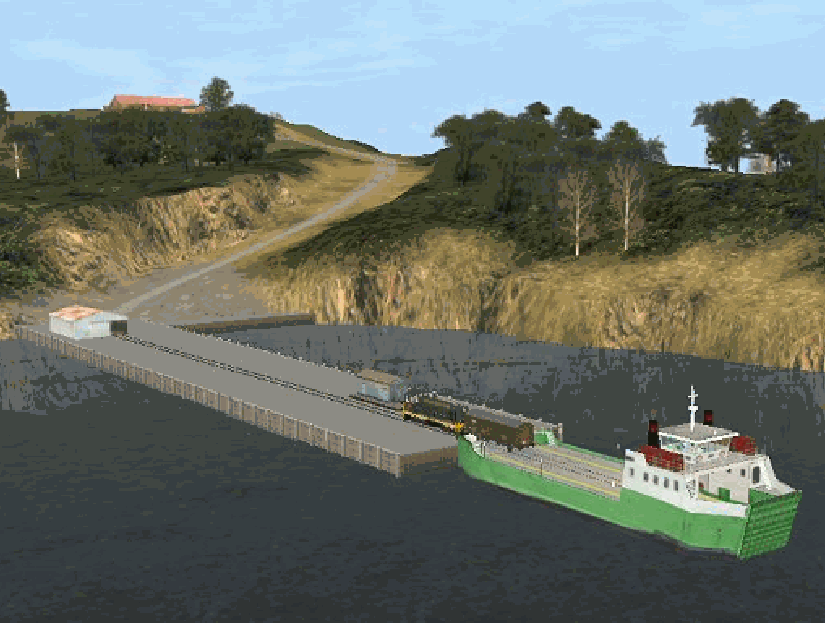
This session requires the Rail Ferry TRS by Vulcan kuid
2:60238:9025:1
Please visit Vulcan’s site for more information and instructions for
this vessel. You may want to add this line to the Rail Ferry TRS
config. Txt file : <disable-exrta-track-sounds 1> As this vessel is
a loco in disguise, it will generate the track click-clack sounds.
This is not wanted on the water.By adding the new disable line, it will eliminate the sounds.
The resident monkeys on Somes Island have eaten all the bananas and
urgently require more.Your job is to transport an AB van load of
fresh bananas to the Somes Island jetty. The session begins when you
pick up your loco at the South Thorndon loco sheds. The pre-loaded
AB van awaits in the adjacent South Goods 1 siding. Take your loco
and AB van down wharf road ( AB Van in front of loco ) and load the
van onto the rail ferry TRS which is berthed at Pipitea wharf. Make
sure the AB Van is "docked" with the invisible coupling on the TRS
Ferry. De-couple your loco from the AB Van and reverse back onto the
wharf and leave it parked there.Transfer into the TRS bridge and
reverse out on the wye. All the junctions - bouys - are set up for
the entire trip. Transport your load to Somes Island jetty and
unload using the jetty loco. Return to Pipitea wharf. The session
ends when you return your loco to the South Thorndon loco sheds.
Don't keep those monkeys waiting ! |
|
INSTALLATION
To install the route and accessories cdp files:
 | I suggest you open your temporary folder and make a new folder -
name it “NZJ “ |
 | Download all the required cdp files and place them in the NZJ
folder. |
 | Start Trainz and select “Manage content”. |
 | Select “Import cdp’s” top left hand corner. |
 | Browse to and open the NZJ folder. |
 | Multiple select files. |
 | Click on open. |
 | On the screen which opens up, select “view in main list”. |
 | Right click to display menu and “select all”. |
 | Right click again and select “edit” and then “commit” from the sub
menu. |
 | Finally, once satisfied all is O.K., delete the NZJ folder. |
Now here is your ticket to ride !

ENJOY !!!
Questions and comments regarding this route can be discussed on the
Auran Trainz discussion forums, “Freeware announcements” and look
for “NZR Johnsonville Line”. You will need to be logged on to access
the Freeware announcements section.
Known stock faults:
There are two points (junctions) in this route
which work “inside out”, i.e. Switch to the right and the train goes left , vice versa. These
points are Tawa deviation down and the entry to the rear unit workshops area, which I have named
Vice versa junction. I have
tried everything I know to correct this, but to date there’s no
remedy - so it’s just the way it is. |
|
|
|
|
|
|
JOHNSONVILLE DOWNLOADS
for Trainz
2006 (Service Pack SP1 installed)
IMPORTANT!! BEFORE
installing the layout please make sure that you have read the instructions
above.
|
|
|
|
|
|
 visits to this page visits to this page
|
