|
| |
New Zealand
Railways TRACK & TRACKSIDE for TRAINZ |
|
|
This
section is dedicated to the Trackwork and Trackside assets used on the
New Zealand network.
Check back regularly for
new additions
|
 |
 |
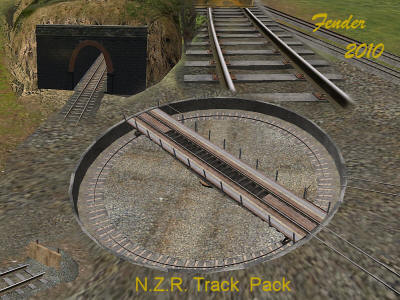
NZR Track Pack
by
Trevor Burt (a.k.a. Fender) |
|
|
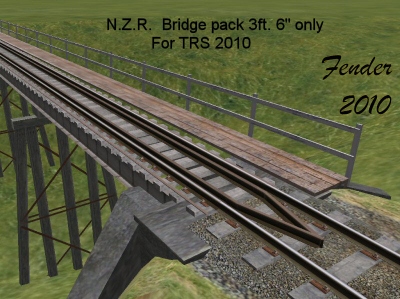
NZR Bridge Pack
by
Trevor Burt (a.k.a. Fender) |
|
|
| |
 |
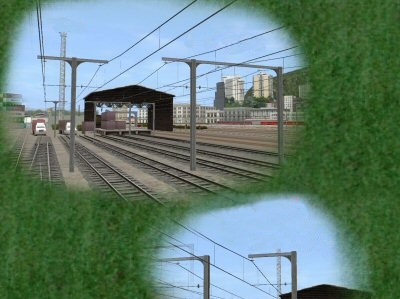 |
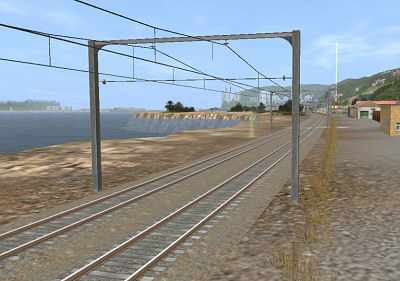
NZR Catenary Pack
by
Trevor Burt (a.k.a. Fender) |
|
|
NZR Catenary
EXPANSION Pack
by
Trevor Burt (a.k.a. Fender) |
|
|
|
|
 |
|
double-click to enlarge |
Models for Trainz 2009* / 2010 by Trevor Burt a.k.a. Fender. Copyright © 2010
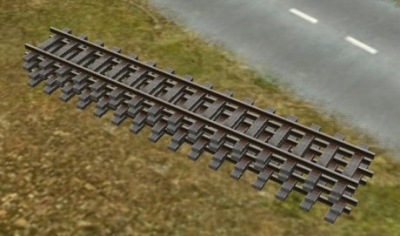
This track pack was born out of need for some decent tracks in my N.Z.R.routes. The pack is intended for Trainz 2010 and is fully compliant in 2009/2010 native and compatibility modes and will not work in previous versions of Trainz.
The main track is 70lb/yard on wooden sleepers with coach bolt anchors. This arrangement is still in use today, but as track upgrades come into play, the sleepers are being replaced with concrete and sprung ties.
The following models all compliment one another. If you wish to join these tracks with other types, I can not guarantee they will mate up correctly.
|
|
 | NZR Track Main 42-70 4 x lod levels Cat. NZ Track
|
 | NZR Track Yard 42-55 4 x lod levels Cat. NZ Track
|
 | NZR Track Yard Rusty 42-55 4 x lod levels Cat. NZ Track
|
 | NZR Track Main-Snow 42-70 4 x lod levels Cat. NZ Track
|
 | NZR Track Yard-Snow 42-55 4 x lod levels Cat. NZ Track
|
 | NZR Track Yard-Snow-Rusty 42-55 4 x lod levels Cat. NZ Track
|
 | NZR 70ft. Turntable, Cat. NZ Objects. It has 10 x selectable entry-exits at 15 deg. Intervals. This turntable uses 3 x 3 digholes. To place,
make sure the terrain at this point is flat. Rotate the T/T if required. Choose which entry/ exit you wish to activate. There will be 2 x
track vectors ( white circles) close together on the outer perimeter for each entry/exit. Select a TT Link track from the “object” Cat.
Place the TT Link outside of the turntable perimeter ( must not place on the perimeter texture). Rotate the TT Link ( use the object
Rotate tool) so its triangular shaped “pointer” is approximately aimed at the T/T centre. Next, move the TT Link to line over the
Innermost of the 2 x track vectors. It will “snap” into position at this point. The main track then connects to the outermost track vector.
Repeat this procedure for additional entry/exit tracks. |
 | NZR TT Link track, obviously for use with the turntable. Cat. NZ Objects
|
 | NZR Terminus buffer, will stop trains up to 10m.p.h. Cat. NZR Track object
|
 | NZR Yard buffer, will stop trains up to 10m.p.h. Cat. NZR Track object
|
 | NZR Track ballast transition, intended to fill the gap where main and yard tracks meet, due to the difference in ballast height. It can also be
used as a track end filler or a gap filler at bridge track-main track junctions. Cat. NZR Track object
|
 | NZR Single old tunnel (actually, the Christchurch – Lyttleton tunnel) Cat. NZ Track
|
 | NZR Double old tunnel Cat NZ Track
|
 | NZR Modern single tunnel Cat NZ Track
|
 | NZR Modern double tunnel Cat NZ Track
|
Note:
These tunnels require a manual dighole, these come with 2009/2010. They can be placed at any angle you wish. I suggest to place the
tunnel portal just forward of a terrain square and as near in-line with it. It should only be necessary to use one dighole at each end.
NZR Tunnel track. This is a “chunky mesh” track which is as near as possible to look like my NZR main track and is a temporary measure
until I have knowledge on how to get multi-lod-level track into tunnels and bridges. I eagerly await C.C.G. for 2010.
 | NZR Tunnel buttress L/H. For use with the modern tunnel. This can be placed in-line or at any angle you wish. Cat. NZR Object
|
 | NZR Tunnel buttress R/H. Cat. NZR Object
|
Note:
These terrain shells can be manipulated using the object height, rotate and move tools. Once you are happy with its position, just
prick up the surrounding terrain with the terrain tools. Be careful not to prick up the dighole too high.
* Remember – before you download, these items are 2009/2010 only and will not work in previous versions of Trainz.
 | Tunnel terrain shell , high – covers the gaps left by the dighole. Cat. Objects > tunnel
|
 | Tunnel terrain shell, low Cat. Objects > tunnel
|
 | Tunnel terrain shell, concave high Cat. Objects > tunnel
|
 | Tunnel terrain shell, concave low Cat. Objects > tunnel
|
Have fun,
Cheers,
Trevor Burt a.k.a. Fender.
|
|
|
|
|
|
|
NZR Narrow
Gauge 42"
|
|
NZR Track Pack
nzr_trackpack.zip
(15.4mb)
TRS2009 &
TRS2010 compatible format |
NZR Turntable
nzr_70ft_turntable_v2.cdp
(2 Mb)
TRS2009 &
TRS2010 compatible format |
|
NZR Turntable 180
(Same
turntable as above but
with only with 2 stops at 0
and 180 degrees)
NZR 70ft. Turntable
v180.cdp
(2 Mb)
TRS2009 &
TRS2010 compatible format |
|
|
|

 |
| |
Models for Trainz * 2010 by Trevor Burt a.k.a. Fender. Copyright
© 2010
N.Z.R. BRIDGE /
TRACK PACK -3ft. 6", 1067mm.
Models for
Trainz 2009* / 2010 by Trevor Burt a.k.a. Fender. Copyright ©
2010
Release
notes:
This bridge
track pack is designed to use in conjunction with and compliment
my NZR Track pack. If you wish to join these tracks with other
types, I can not guarantee they will mate up correctly. The pack
is intended for Trainz 2010 and is fully compliant in 2009/2010
native and compatibility modes and will not work in previous
versions of Trainz.
 | NZR bridge,
small plate girder – 6m to 30m 4 x lod levels Category = NZR
Track |
 | NZR bridge,
large plate girder - 30m to 250m 4 x lod levels Category =
NZR Track |
 | NZR bridge
divert Category = NZR Track object |
 | NZR Bridge
track only, with guard rail, no ballast Category = NZR Track
|
 | NZR Bridge
track only, no guard rail, no ballast – |
Note: I have
made this special track as a NZR replacement track for use
on Ian Manion’s –a.k.a. "Vulcan" Makatote and Mangaweka
large bridges. I suggest you clone the original bridge and
replace "bridgetrack" in the config.txt file (FOR YOUR OWN
USE ONLY – If you wish to upload a route using Ian’s bridge
with my track on it , then you must contact Ian first for
his approval.) - - - - - - - - - - - - Category = NZR Track
 | Bridge
terrain shell, single – A terrain model with attached
concrete abutment- Category = NZR Track objects |
 | Bridge
terrain shell. Dual " Category = NZR Track objects |
 | Bridge
terrain shell, Dual 30degs left going " Category = NZR Track
objects |
 | Bridge
terrain shell, Dual 30degs right going " Category = NZR
Track objects |
Note:
These terrain
shells attach to the track as a track object. This makes it easy
for exact positioning. They are really for installing on track
which is level, but with careful manipulation of the surrounding
terrain, they are useful up to a 2% or 1/50 gradient. To place a
dual track bridge, first lay one single track, then attach a
dual terrain shell. This shell will then set the distance to
place the second bridge track.
Some trial and
error may be required, but very easy once you have it mastered.
 | NZR bridge
pylon wooden, small, single Category = NZR Track objects |
 | NZR bridge
pylon wooden, large, single Category = NZR Track objects |
 | NZR bridge
pylon wooden, small, dual Category = NZR Track objects |
 | NZR bridge
pylon wooden, large, dual Category = NZR Track objects |
 | NZR bridge
pylon concrete, large, single Category = NZR Track objects |
 | NZR bridge
pylon concrete, large, dual Category = NZR Track objects |
 | NZR bridge
pylon concrete, large "E", single with pedestal for catenary
post Category = NZR Track objects |
 | NZR bridge
pylon concrete, large "E", dual with pedestal for catenary
post Category = NZR Track objects |
 | NZR Bridge
walkway – I have made this as a splined object for you to
place as you may wish. I do not know the NZR m/o for these
walkways – some bridges have them on one side only, some
have them on both sides, some don’t have walkways at all. -
Category = NZR splined objects- and can be straightened
using the T/S tool. |
Some extra’s
:
 | NZR track
stack – a stack of 3ft. 6" rails with sleepers Category =
NZR objects |
 | NZ Dark
road, low poly, traffic enabled. (Flat road, clean edges)
Category = NZR splined objects |
 | NZ Dark
road, low poly, no traffic (Flat road, clean edges) Category
= NZR splined objects |
 | NZ Dirt
road, low poly, traffic enabled (Flat road, alpha edges)
Category = NZR splined objects |
 | NZ Dirt
road, low poly, no traffic (Flat road, alpha edges) Category
= NZR splined objects |
- - - Note: I
have made these roads to suit my own specific needs, but you may
find a use for them. I have set the object "Y" axis at 0.05 to
help reduce the "Floating road" look. The road vehicles seem to
run fairly close to the road surface in 2009/2010.
* Remember –
before you download, these items are 2009/2010 only and will not
work in previous versions of Trainz.
Have fun,
Cheers,
Trevor Burt a.k.a. Fender.
|
|
|
|
|
NZR Bridge
Pack
|
| nzr_bridgepack.zip
(4.7 Mb)
TRS2009 &
TRS2010 |
|
|
Models for Trainz * 2010 by Trevor Burt a.k.a. Fender. Copyright
© 2010
HISTORY
These models
represent the type of overhead catenary used by NZR in the
Wellington region around 1960
– 1980’s.
I am not sure if they are still in use, or perhaps been
upgraded, but they have been built for use in my own routes
which detail that era.
In testing, I have found slight ground - wire
height variances between versions 2006,2009 and 2010, so I have
set the splines
at
a
“happy medium”.
It may be necessary to tweak the spline points up or down to
compensate. From my experience, this is a
common thing with route building in TRS
and difficult to get catenary excact. The S.G. version has the
wire height at 20ft. approx.
The 42”
version has the wire height at 18ft. approx. Enjoy and have fun
!
*Note, this
model is aimed at TRS2009/TRS2010, but will work in TRS2006.
Enjoy, available
in S.G. and 42 ”
versions,
Have fun,
Cheers,
Trevor Burt a.k.a. Fender. |
|
|
|
|
NZR Catenary
Pack
|
| NZR_Catenary_SG_and_42-all files.zip
(190 Kb)
TRS2009 &
TRS2010
(will also work in
TRS2006) |
|
|
|
|
 |
Models for Trainz * 2010 by Trevor Burt a.k.a. Fender. Copyright
© 2011
N.Z.R. Catenary Expansion pack
(3ft. 6 ”
only), Wellington region
BRIEF HISTORY:
These models represent the type of
overhead catenary used by NZR in the Wellington region around
1960 –
1980’s. I
am not sure if they are still in use, or perhaps been upgraded,
but they have been built for use in my own routes which detail
that era.
In testing, I have found slight ground
- wire height variances between versions 2006,2009 and 2010, so
I have set the splines at a
“happy medium”.
From my experience, this is a common thing with route building
in TRS and difficult to get catenary exact. It may be necessary
to tweak the spline points up or down to compensate. For this
you can make use of the Catenary wire height tool. This tool is
surveyor only enabled, so will not show in
“driver”
for testing, but once happy with your Cat, adjustment, delete
these gauges in surveyor. I suggest you place one gauge at each
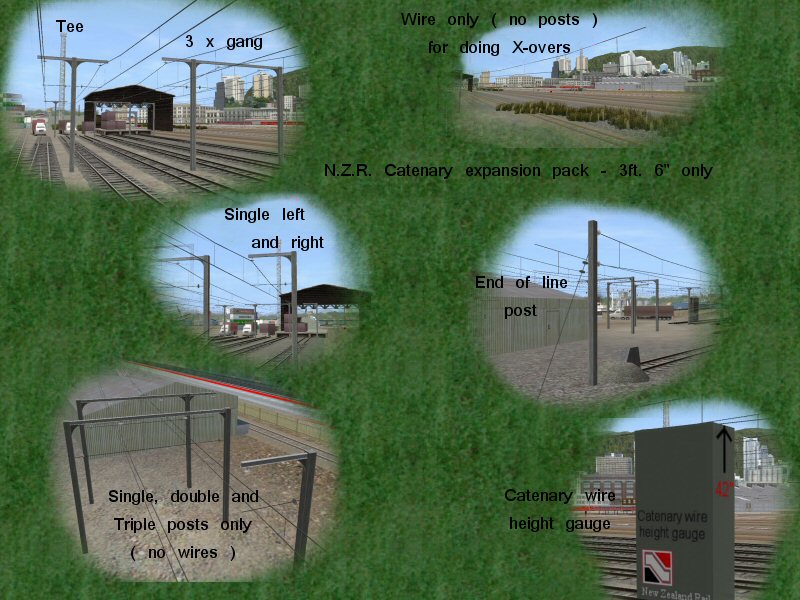
spline point, particularly on graded bends. The wire only (no
posts ) is for doing crossovers, junctions and slips. The wire
will s-t-r-e-t-c-h to approx 100 metres before it repeats, so
this should be plenty for this application. The gantries only (
no wires ) are to aid placement in odd situations and may help
with doing crossovers and points. The end of line post is for
e.g. Melling, Upper Hutt. The tees are handy for station dual
platforms and Wellington yards. The 3 x gang can be used where
required. There is now a left handed single and a right handed
(mirrored) single catenary.
I have deliberately
not excelled in detail to keep the overall route-build poly
count down.
*Note, this model is aimed at
TRS2009/TRS2010, but will work in TRS2006.
Enjoy, have lots of fun.
Cheers,
Trevor Burt a.k.a. Fender.
|
|
|
|
|
NZR Catenary
Pack
|
| cat_pack.zip
(0.3 Mb)
TRS2009 &
TRS2010
(will also work in
TRS2006) |
|
 visits to
this
page visits to
this
page
|
