For
TS2010 / TS2009 / Classics / TRS2006
/ TRS2004
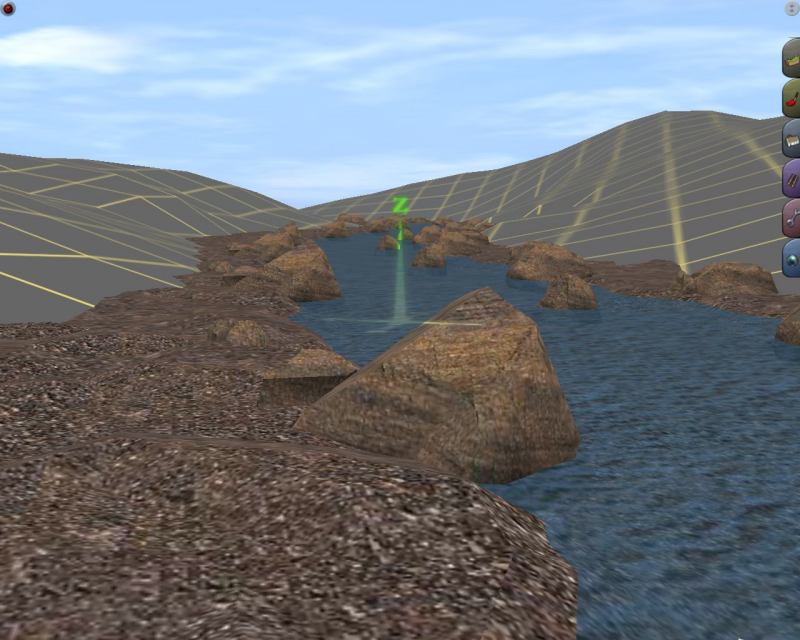
So that you can see the
amazing addition that the river spline set will make to your layout we have included a
sample for you to experiment with.
The sample contains two river types:
- A sunken river spline
- A canyon river spline
Both sample splines come with one spline
and one texture type but have transition pieces attached at both ends and can be added to
and stretched as often as you like.
This download is free for your own use and
may be distributed freely. However it may not be posted for download from any other
internet web site or included in any commercial package without prior permission.
WIth the sample download
the river-bed is solid which, unfortunately, makes it difficult to see when adding
additional invisible track for running boats (but not impossible). With the full
river set you also get separate riverbanks and transparent water splines which make adding
additional invisible track simple.
INSTRUCTIONS
While the samples are updated to work in TRS2006 the following base
instructions are for TRS2004 or earlier
SUNKEN RIVER SPLINE
Start by experimenting on a flat base board
You'll find the spline on the "spline
objects" panel located under the region "SG_River"
(SP1.3/UTC/TRS2004 only)
(TRS2006
and later will require filters to be
setup)
Pick a start point and drag the river
spline out. You now have a simple river spline with both ends attached.
To add to the river spline stay in the
"ADD" objects mode and select the spline point at either end of the spline
Now drag you new river extension out.
Repeat this process until you've created an
experimental curving river.
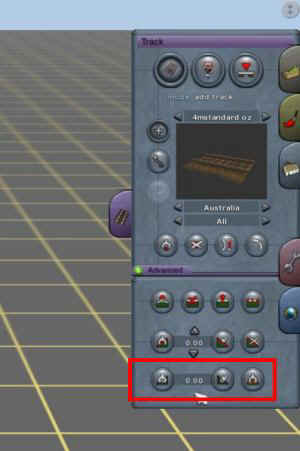
Now lets embed our river into the ground.
For the sunken river spline type a value of
9.5 into the "Spline height" text-entry box.
Now pick each of your spline points to drop
the spline so that the rim of the river spline is just above the ground level
Enter a value of 10 into the "Height
value" text-entry box
Set your radius dial button to a minimum.
Trace the circle along the approximate
centre of your river to expose the river.
Pick the "height down" button
(the top middle button on the panel) and push down the remaining exposed terrain.
If you have pushed too much terrain down at
the edge of the spline enter a value of 0 into the "Height value" text-entry box
to lift any edge terrain back up that may have been pushed down
Experiment with creating hills to cover the
flat edges and merge them into the sloping river bank edges
FLAT SIDE RIVER SPLINE
This is straight forward to use and needs little
explanation.
Try experimenting on a flat base board
with raising the terrain along the spline edge and then merging the terrain into and
through the rivers edge. Try extending some hills into the water to create small beaches
IMPORTANT TIPS
If you want to start (or end) your spline
close to the end of an "existing" spline, BUT DON'T WANT TO CONNECT TO THE EXISTING
SPLINE, hold the "Shift" key down to keep them seperate.
When picking spline points close to existing
splines (including track) hold the "shift" key down otherwise the spline point you
pick will not work.